Tuesday, April 22, 2014

ASSIGNMENT 1: REFLECTIONS

ASSIGNMENT 1

REFLECTIONS

After the assignment 1 was done, there were some questions have to be answered and reflected by students. The questions were listed as below:

1) What part of the assignment was most difficult to demonstrate in your photos?

In my opinion, the most difficult part in assignment 1 was the Part 1: Basic Composition. Among the five concepts in the basic composition, the easiest was the rule of thirds as it depended on me to adjust the angle to place the subject in the sweet spots of the photo. The hardest was the "Framing", as the frame itself occupied some places from a photo, making the space became lesser for the main subject. Furthermore, it was hard to locate a good position for the frame so that it won't distract attention from the main subject. The last difficulty was that it was hard to find a frame which can be positively used to capture the main subject. With all these difficulties, I seriously agreed that framing was the most difficult and brain-squeezing part for me to come out with good idea to implementation this concept in my photography.


2) Which of your photo do you think was the most successful, and why?

Among the photos I captured in Assignment 1, I thought the following photo was the most successful one.

f/9 | 1/20s | ISO 100 (Nikon D3000@55mm)
It was such a weird case, as the photo I thought was the most successful was also the hardest part I explained in Question 1, which was the "Framing". However, examining this photo, I concluded myself the frame which was the leaf not only didn't distract the attention of readers, yet it helped to direct the focus to the duck. The duck which was located at the sweet spots of a photo became the main focus too. I was in great satisfactory when I reviewed this photo. 

It did not mean the other photos were not successful, it was the fact that this photo outdistanced the others as the others meets the requirement of the concepts, however this photo told a story and brought mystery to readers to lock their attention on the duck to see what was going on next.


3) How did this assignment change the way you view taking pictures?

This assignment definitely changed the way I view while taking pictures. As I looked back the photos I took previously before I registered this course, the photos' background were complex, the subject was not clearly projected, there was too many distractions and angle of interpretation was terrible. 

However, after weeks of lecture and practices, I clearly felt that my photographing skills were upgraded and advanced. Although I was still far to become a professional photographer, but at least now I could see which view was the sweet spot to place the subject and how to prioritize the main subject. Using the basic compositions' principles, I could also capture the same from different perspective to make it more interesting and outstanding.

Besides, I have learnt too on using a DSLR, either theoretically or practically. Departed as a beginner in the world of photography and growing healthily now, the lessons I gained through the course were precious, which couldn't be valued through money system. It was the right choice I made to register this course, I have no regret on it.


4) Other thought on the process.

Thinking off to take good photos and be aligned with the requirements of the basic compositions initially was a tough road to walk on, however, with helps and advises from DR. Jamalludin and Encik Fuad, things started to go smooth and easier. It was such a good time to have both knowledgeable photographer to guide me during the whole process.

Another thought was that there was tons of objects or views available which can be captured as the main subject for different topics, the process to choose the best option was also a good test. However, as far as I concern, I enjoyed to take photos and examine the quality of it from time to time.

Lastly, I felt thankful to the faculty, Dr. Jamalludin and Encik Fuad for lending us a DSLR for free and guided us well during the process. Without their kindness help, I believe it took longer and harder to learn alone.

Allow me to send my highest gratitude to Dr. Jamalludin and Encik Fuad, thank you very much!


Monday, April 21, 2014

ASSIGNMENT 1 PART 2: ANGLE AND INTERPRETATIONS

ASSIGNMENTS 1

PART 2: ANGLES AD INTERPRETATIONS

In this part of the assignment, an object has to be chosen and to be captured in different angles to interpret different opinions from various perspectives. The photos were shown below.

All photos were captured using MANUAL mode with the exposure indicator at the middle.

OBJECT 1: THE FLOWER

f/3.5 | 1/30s | ISO 100 (Nikon D3000@18mm) 
The normal macro mode which focus on the flower, this photo used rule of third and simplicity as the background was relatively plain.

f/3.5 | 1/25s | ISO 100 (Nikon D3000@18mm)
 This photo used the rule of third but not simplicity as the background was complex. The side of the flower was captured.


f/3.5 | 1/60s | ISO 100 (Nikon D3000@18mm)
This photo used rule of third and low angle shooting to represent the flower's unique under the blue sky.

f/3.5 | 1/40s | ISO 100 (Nikon D3000@18mm)
This photo used rule of third and frame. The leaf beside acted as a frame to pictured the flower from the picture. 


OBJECT 2: THE MOTORCYCLE UNDER THE RAIN


f/5.6 | 1/15s | ISO 400 (Nikon D3000@30mm) 
The rule of third and simplicity were implemented in this photo, showing it was lonely to stand alone under the rain.

f/5.6 | 1/15s | ISO 400 (Nikon D3000@46mm)
The concept balanced was used in this photo to leave the motor at the center. Meanwhile, the photo was captured using high angle shooting to show the motor was powerless under the rain (which in terms of humanistic, we called it EMO).


f/5.6 | 1/20s | ISO 400 (Nikon D3000@26mm)
Again the rule of third was used. The angle of shooting was at the left side of the motor to show another interpretations of the motor under the rain.


f/5.6 | 1/15s | ISO 400 (Nikon D3000@40mm) 
The rule of third and line were used in this photo. The motor became less lonely as there was other motors parked beside it and the motors are aligned to present a line concept.

f/5.6 | 1/25s | ISO 400 (Nikon D3000@26mm)
The aligned motors which were captured using line concept from the left side.


OBJECT 3: THE UTM LOGO FROM MAIN GATE

f/10 | 1/160s | ISO 100 (Nikon D3000@26mm)
The concept balanced and simplicity was implemented in this photo to place the logo of the UTM at the middle. The drawback of the picture was the cars which distracted the attention of readers.

f/10 | 1/100s | ISO 100 (Nikon D3000@34mm) 
The logo of the UTM was placed at the sweet spots of the right side of the photo to caught readers' attention more effectively.


f/10 | 1/100s | ISO 100 (Nikon D3000@32mm) 
The concept simplicity and low angle shooting were used in capturing this photo which the logo of the UTM with its motto could clearly be read.


f/10 | 1/80s | ISO 100 (Nikon D3000@32mm)
The logo of the UTM was now placed at the sweet spots of the leftside of the photo to caught readers' attention more effectively.


OBJECT 4: THE LAMP AT TASIK ILMU


f/5.6 | 1/640s | ISO 100 (Nikon D3000@32mm)
The standing lamp captured using low angle and rule of third to project it to the blue sky which directly made the photo caught the attention of the readers easily.


f/5.6 | 1/400s | ISO 100 (Nikon D3000@32mm) 
This photo was captured using low angle shooting and balanced concept. The shining light from the glass at the left side caught my attention when I took this photo.


f/5.6 | 1/640s | ISO 100 (Nikon D3000@32mm)
Again, the standing lamp was captured using low angle, rule of third and simplicity to project it to the blue sky. The plain background of the sky made the lamp be prioritized in this photo.


f/5.6 | 1/250s | ISO 100 (Nikon D3000@32mm)
 The another lamp formed a line concept with this lamp.


f/5.6 | 1/500s | ISO 100 (Nikon D3000@45mm)
The standing lamp placed at the middle to divide the photo to be vertically symmetry. The concept balanced was implemented.


REVIEWS:

Using the tips and tricks learnt in the class especially the basic composition principles enabled me to capture pictures with better quality and better interpretations. I greatly felt satisfactory to examine these photos which represented the increment of my photographing skills compared to days before I registered this course. Thanks to the faculty, Dr. Jamalludin and Encik. Fuad to help me and guide me faithfully along the course.


ASSIGMENT 2 PART 2: The Day When She Said "I Do"

ASSIGNMENT 2: CREATIVE CAPTURE

PROJECT: THE DAY WHEN SHE SAID I DO

(In this assignment, all photos uploaded were continued with a paragraph of description)

The Wedding Invitation Card
f/5.6 | 1/6s | ISO 100 (Nikon D3000@42mm)

On that day, a wedding invitation card was received. I was invited to attend a wedding ceremony to share the happiness of a new couple who loved each other.

The Flight to Kota Kinabalu International Airport
f/8 | 1/6s | ISO 100 (Nikon D3000@32mm)

A flight was then booked and I departed from Senai International Airport in Johor to Kota Kinabalu International Airport in Sabah. With full blessings, I safely reached the destination.

Make-Up Process
f/5 | 1/4s | ISO 200 (Nikon D3000@36mm)

It was an once a lifetime event. The make up artist tied her very best to masquerade the bride to ensure she was the most beautiful woman on that day.

Bride After Make-Up
f/5.6 | 1/8s | ISO 400 (Nikon D3000@55mm)


Parents of the Bride
f/5.6 | 1/10s | ISO 400 (Nikon D3000@55mm)

It was the Chinese traditions to ensure the bride was dressed decently beautiful as a respect to the bridegroom. Parents who loved the bride so much was happy to see their daughter met with her true love in her life.


The Waiting Bride
f/5.6 | 1/200s | ISO 400 (Nikon D3000@55mm)

The wedding ceremony started in an hour. The bride was happy, while waiting in full expectation, as started from that day, she would be living with her true love.


The Waiting Bridegroom
f/10 | 1/50s | ISO 100 (Nikon D3000@55mm)

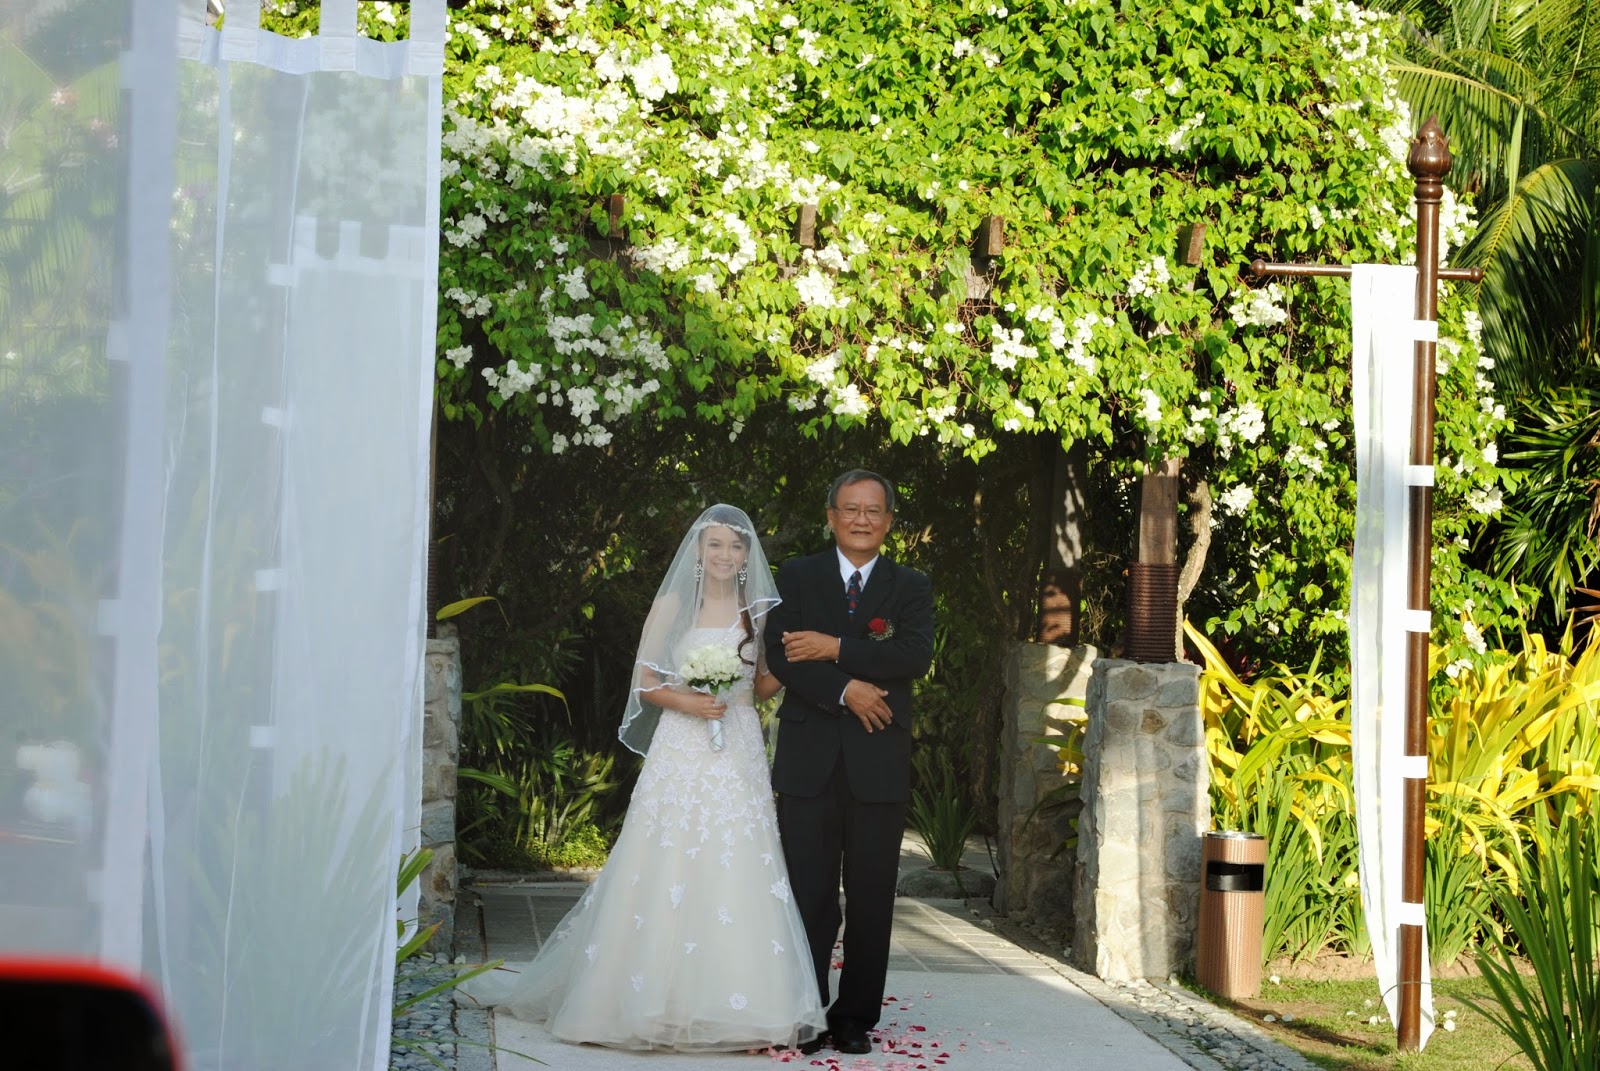
The ceremony took place at a beach in the Rasa Ria Resort. According to the Chinese traditions, the father of the bride should pass his daughter to the bridegroom in the ceremony as this meaningful action indicated the father trusted the bridegroom to take care his daughter for the rest of her life. The bridegroom was waiting in excitement, waiting his true love to reach the place as fast as possible.

The Bride and Her Father Walking into the Ceremony Place
f/13 | 1/40s | ISO 100 (Nikon D3000@55mm)

The wedding song was then played. The father and the bride walked step by step in front before he passed his daughter to the bridegroom. All the guests clapped to bless this couple to be loving and caring with each other.


The Bride Cried
f/13 | 1/25s | ISO 100 (Nikon D3000@42mm)

Years of memorable family moment of the bride to live under the same roof with her parents brought her so much memories. Thinking of leaving the family that she was so familiar with and entered a new chapter in her life, she cried, in gratefulness, and touching.

The Father of the Bride Passed Her Hand to the Bridegroom
f/10 | 1/25s | ISO 100 (Nikon D3000@55mm)

The moment has come. The father passed his daughter's hand to the bridegroom, hoping he would take good care of his daughter from now on to bring happiness in her life.

The Wedding Ceremony
f/9 | 1/25s | ISO 100 (Nikon D3000@48mm)

As the couple were christian, the ceremony was held by a pastor. Standing in front of all guests, they declared, would take care each other, as stated in the declaration of intents.

Wedding Declaration of Intents
f/11 | 1/50s | ISO 100 (Nikon D3000@50mm)

Wedding Declaration of Intents
f/11 | 1/50s | ISO 100 (Nikon D3000@55mm)

"Do you promise to love and comfort him/ her, honor and keep him/ her, in sickness and in health, for richer and for poorer, for better or for worse, and be to be faithful to him/ her as long as you both shall live?"


The Day When She Said, "I Do."
f/11 | 1/40s | ISO 100 (Nikon D3000@55mm)

" YES, I DO."


We were so happy to see you have a good husband to be with you for the rest of your life. Wishing you a happy wedding and blessed to you a fullness life and happy always, my dear sister.

The Wedding Poster
f/11 | 1/30s | ISO 800 (Nikon D3000@32mm)

My Sister and Her Husband
f/5.6 | 1/20s | ISO 100 (Nikon D3000@55mm)


Sunday, April 20, 2014

ASSIGNMENT 1 PART 1: BASIC COMPOSITION

ASSIGNMENT 1- ANGLE AND COMPOSITION

PART 1: BASIC COMPOSITION

As explained in the weekly reflection before, the description of the basic composition were reflected. Thus, in this part of assignment 1, the photos for each components of basic composition were presented as an indication that I could the understand the concept well.

1) SIMPLICITY

f/5.6 | 1/6s | ISO 800 (Nikon D3000@55mm)
This advertisement was short and easy to caught attention. Yet it's meaningful.


f/10 | 1/200s | ISO 100 (Nikon D3000@55mm)
A stone on the water, plain and easily became the main focus.


2) RULE OF THIRD

f/5.6 | 1/50s | ISO 100 (Nikon D3000@40mm)
The goat face was exactly on the location of the sweet spots in the rule of third.


f/5.6 | 1/25s | ISO 100 (Nikon D3000@55mm)
The tasty teh tarik, looked more tasty and attractive when it is captured using the rule of third.


f/5 | 1/2s | ISO 100 (Nikon D3000@30mm)
The chinese traditional noodle in chicken soup became focus using the rule of third.


C) BALANCE

f/10 | 1/20s | ISO 400 (Nikon D3000@24mm)
The beds were identically and vertically symmetry. This photo was captured using the rule balanced.


f/5.6 | 1/40s | ISO 400 (Nikon D3000@26mm)
The students who participated the Program "JOM! BACA 10 MINIT BERSAMA" in the primary school lined up to back to their class. The picture was balanced as the pillars on both sides symmetrically divide the photos into left and right in equal portion.


D) LINE

f/5 | 1/160s | ISO 100 (Nikon D3000@38mm)
 The photo was directed to the right that attracted the attention of readers to focus to the right side of the photo.


f/5.6 | 1/10s | ISO 100 (Nikon D3000@45mm)
The lamps formed a direction to the middle. There was a drawbacks in the photo which was the people who distracted the focus of the photo.


f/5.6 | 1/15s | ISO 100 (Nikon D3000@22mm)
The Porgram "JOM! BACA 10 MINIT BERSAMA" in the primary school. Teachers and the pillars were aligned formed a line concept in this photo.


E) FRAME

f/3.5 | 1/125s | ISO 100 (Nikon D3000@18mm)
The roof of the strawberry farm served as a frame in this photo.

f/9 | 1/20s | ISO 100 (Nikon D3000@55mm)
The duck viewed from the leaves which acted as a frame. I liked this photo. It was a picture inside a picture.


REVIEWS:

Knowing the tips and tricks of the basic composition helps to capture a better quality and eyes-catching photo. I should practice these principles frequently to skill up my photographing abilities.

ASSIGNMENT 2 PART 1: CREATIVE CAPTURE

ASSIGNMENT 2: CREATIVE CAPTURE

PART 1: GET CREATIVE WITH SHUTTER SPEED AND APERTURE

In this part of the Assignment 2, the main aim was to ensure students were able to manipulate with the exposure settings to produce the required effects in a photo. Thus, in this section, I tried myself on using these exposure settings to produce the best pictures as I could where the first 3 sets of photos described on the effects of the settings of aperture, shutter speed and ISO individually while the other sets highlighted on using exposure settings to produce the identical quality of photos.

SET 1: APERTURE

In this section the effect of aperture was described.

f/29 | 1/6s | ISO 100 (Nikon D3000@38mm) 

f/16 | 1/20s | ISO 100 (Nikon D3000@28mm) 

f/10 | 1/60s | ISO 100 (Nikon D3000@28mm)

f/4.5 | 1/250s | ISO 100 (Nikon D3000@28mm) 
It should be noticed that by decreasing the aperture from f/29 to f/4.5, the size of the hole becomes larger and the depth of field becomes smaller where the sharp area becomes smaller, which produces a photo with all background was blurred off while focusing on the leaf only.

It has to be noticed when the aperture setting become smaller, the shutter speed become larger, it is because a smaller aperture has a larger size of the hole in lens which allows more light to travel into the camera, thus the shutter has to be shut off faster in order to produce a photo without overexposure.


SET 2: SHUTTER SPEED

In this section the effect of aperture was described.

f/2.5 | 1/30s | ISO 100 (Nikon D3000@18mm)

f/3.5 | 1/80s | ISO 100 (Nikon D3000@18mm)

f/3.5 | 1/100s | ISO 100 (Nikon D3000@18mm)

f/3.5 | 1/125s | ISO 100 (Nikon D3000@18mm)

It can be noticed when the number of denominator of the shutter speed became larger, the shutter speed reacted faster to shut off the shutter faster, which was able to freeze the rotating tyre. Thus, from the last photo we were able to observe the tyre stripes more clearly compared to the first photo. However, because the shutter was shut off faster, the last photo was darker than the first photo as the light traveled into the camera became lesser.


SET 3: ISO

In this section the effect of ISO was described.

f/14 | 1/6s | ISO 100 (Nikon D3000@18mm)
f/14 | 1/6s | ISO 200 (Nikon D3000@18mm)

f/14 | 1/6s | ISO 400 (Nikon D3000@18mm)

f/14 | 1/6s | ISO 800 (Nikon D3000@18mm)

ISO is the sensitivity of the camera to the light. From the photos, we can easily notice that once the ISO value was increasing the leaving shutter speed and aperture settings to be constant, the photos were getting brighter as the camera became more and more sensitive to the light. Thus, high ISO is preferable in night shot. However, one drawback of high ISO is that the photos produced contain more noise, which affects the quality of a photo.


After the effects of these exposure settings were reviewed, below were the sets of photos which were produced with identical quality and yet different exposure settings.


SET 4: THE LANDSCAPE VIEW


In this section, the landscape view captured using 5 different exposure settings were compared.

f/10 | 1/125s | ISO 100 (Nikon D3000@20mm)

f/16 | 1/60s | ISO 100 (Nikon D3000@20mm) 

f/25 | 1/25s | ISO 100 (Nikon D3000@20mm)


f/11 | 1/200s | ISO 200 (Nikon D3000@20mm)

f/22 | 1/50s | ISO 200 (Nikon D3000@20mm) 


Adjusting the settings of ISO, shutter speed and aperture, it can probably be noticed the quality of the photos were still identical.

For the first until the third photo, with the same ISO at 100, when the aperture is getting larger from f/10 to f/25, the size of the hole of the lens opened for light to travel into camera was getting smaller. Thus, in order to get enough light to ensure the photo captured were precisely exposed, the shutter speed has to be slower changing from 1/125s to 1/25s to let more light to travel into the camera body.

Now comparing the first and the fourth photo, with the same aperture which was f/10 yet with ISO increased to 200 in the fourth photo, the shutter speed closed faster in the fourth photo. It was because the increasing ISO increased the sensitivity of the lens to the light which resulted in better light "catching". Thus, the shutter has to be closed faster to avoid the fourth photo to be overexposed.

The fourth and fifth photo followed the same explanation as in the explanation of the different exposure settings for the first till third photo.


SET 5: THE VIEW OF UTM MAIN GATE FROM TASIK ILMU

In this section, the landscape view captured using 5 different exposure settings were compared.


f/13 | 1/80s | ISO 100 (Nikon D3000@55mm)

f/36 | 1/10s | ISO 100 (Nikon D3000@55mm)

f/29 | 1/30s | ISO 200 (Nikon D3000@55mm) 

f/16 | 1/100s | ISO 200 (Nikon D3000@55mm) 
f/22 | 1/100s | ISO 400 (Nikon D3000@55mm)
In this section, the first two photos were captured using ISO 100. When the aperture increased from f/13 to f/36, the shutter speed decreased from 1/80s to 1/10s as the increasing aperture decreased the size of the hole of the lens for travel to travel into the camera. Thus, the shutter has to be shut off slower to ensure enough light getting into the camera for a good quality photo to be captured.

The third and the fourth photo were captured using ISO 200. Comparing the third and the second photo, with similar aperture setting yet with ISO 200 in the third photo, the shutter increased from 1/10s to 1/30s as the sensitivity of the camera to light in the third photo was higher than the second photo. Thus, the shutter has to be closed faster to capture the third photo.

The third and fourth photo has different aperture settings which caused different shutter speed. This was explained in the comparison between the first photo and the second photo.

Lastly, the ISO was increased further to 400 in the fifth photo. Examining the aperture settings for the fourth and fifth photo, the aperture increased from f/16 to f/22 which caused the size of the hole to be smaller and normally the shutter has to be closed slower. However, as the sensitivity of the lens to the light increased, this served as a compensation to the effects due to the increased aperture. Thus, the shutter speed remained at 1/100s for the fourth and fifth photo.


These sets helped me boost up my knowledge on the three musketeers after I practically take some photos with different exposure settings.